
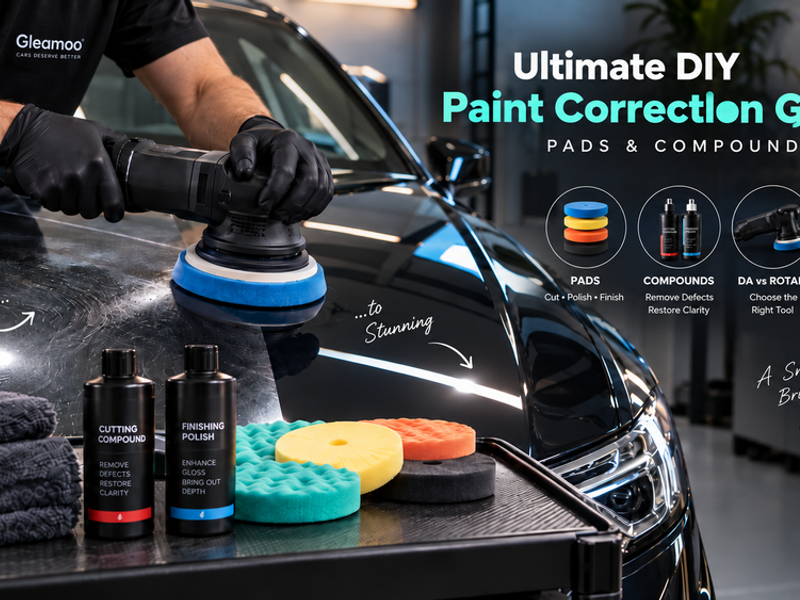
Written by Tipsy Batta, Team Gleamoo
Estimated Read Time: 15 minutes
Introduction: Can You Really Correct Car Paint at Home?
Paint correction is one of the most satisfying parts of automotive detailing. When performed correctly, it can dramatically reduce swirl marks, wash scratches, oxidation, water spotting and other defects that make otherwise healthy paint look dull.
But there is an important distinction every DIY detailer needs to understand:
Paint correction does not simply clean or shine the paint. It removes a microscopic amount of the paint system—usually the clear coat—to level the surface around defects.
That is why choosing the right polishing machine, pad and abrasive product matters.
Use a combination that is too mild and you may achieve very little. Use something unnecessarily aggressive and you can remove more clear coat than required, introduce haze, damage edges or potentially create permanent paint problems.
At Gleamoo, our approach to vehicle care is based on one simple principle: preserve as much of the original vehicle as possible while achieving the best reasonable improvement.
This guide explains everything a beginner needs to understand about DIY paint correction, including:
-
Dual-action polishers versus polishing by hand
-
Cutting, polishing and finishing pads
-
Compounds versus polishes
-
How aggressive a combination you actually need
-
Machine speed, pressure and pad movement
-
Paint thickness considerations
-
Why test spots matter
-
How to work safely around edges and body lines
-
What to do if you own no polishing equipment
-
How correction differs for daily drivers and high-value cars
-
When DIY correction should stop and professional assistance should begin
If you're still deciding whether your vehicle actually needs correction rather than ordinary detailing, start with our guide to paint correction vs detailing.
What Is Paint Correction?
Paint correction is the mechanical refinement of a painted surface using abrasives.
Modern automotive paint normally consists of several layers, including primer, colour coat and, on most gloss-finished vehicles, a transparent clear coat.
Swirls and many light scratches are visible because they create tiny irregularities in that clear coat. Light reflects from those irregularities instead of reflecting uniformly from the surface.
Polishing uses microscopic abrasives to remove a very small amount of material surrounding the defect, reducing the difference between the damaged and undamaged areas.
The surface becomes more level, allowing light to reflect more consistently.
That produces the gloss and clarity people associate with professionally corrected paint.
Paint Correction Does Not Repair Everything
Some defects are simply too deep to polish safely.
Paint correction generally works well for:
-
Light to moderate swirl marks
-
Fine wash scratches
-
Light oxidation
-
Mild haze
-
Some water spotting
-
Minor clear-coat staining
-
Light bird-dropping etching
-
Light environmental contamination marks
It cannot properly repair:
-
Stone chips that have removed paint
-
Scratches extending through the clear coat
-
Exposed primer or metal
-
Peeling or failing clear coat
-
Cracked paint
-
Deep key scratches
-
Severe chemical etching
-
Structural corrosion
-
Poor-quality paint repairs
If a scratch strongly catches your fingernail, treat that as a warning that complete removal may require more paint removal than is sensible.
The safest correction isn't always the one that removes every visible mark.
Sometimes reducing a deep defect by 50–70% while preserving the clear coat is a much better result than pursuing perfection.
First Rule of Paint Correction: Use the Least Aggressive Method
Professional detailers often work according to the least aggressive method principle.
That means starting with the mildest combination likely to achieve the desired result.
For example:
Finishing polish + soft polishing pad
If insufficient:
Medium polish + polishing pad
If still insufficient:
Compound + cutting pad
You don't automatically begin with the strongest compound and hardest pad.
Every correction pass removes some material. Clear coat is finite.
The objective isn't:
How much paint can I remove?
It should be:
How little paint can I remove while achieving an acceptable improvement?
This becomes especially important with older cars, previously corrected vehicles, repaired panels and exotic cars whose paint history may be unknown.
Compounds vs Polishes: What's the Difference?
Both products contain abrasives, but their cutting ability differs.
Cutting Compound
A compound is designed for relatively aggressive defect removal.
It can help address:
-
Moderate swirls
-
Heavier wash scratches
-
Oxidation
-
Sanding marks where professionally appropriate
-
More noticeable paint defects
However, an aggressive compound may leave micro-marring or haze, particularly on softer paint.
A finishing polish may therefore be required afterwards.
Finishing Polish
A finishing polish contains finer abrasives.
Its job is usually to:
-
Remove very light defects
-
Refine haze after compounding
-
Increase paint clarity
-
Improve gloss
-
Remove mild machine-polishing marks
Some modern polishes offer substantial correction while finishing extremely well.
One-Step Polish
A one-step product attempts to combine meaningful defect removal with a good finish.
For many daily-driven cars, this can be the smartest option.
Instead of chasing every defect through multiple polishing stages, a one-step process can dramatically improve appearance while preserving more clear coat and reducing working time.
Understanding Polishing Pads
The liquid product is only one part of the correction system.
Your pad has an enormous influence on how aggressively that product works.
Two people can use the same compound and get very different results simply because they're using different pads.
Foam Cutting Pads
These are relatively firm foam pads designed to increase correction ability.
They're suitable for moderate defects but can sometimes produce haze on softer paint.
Foam Polishing Pads
A polishing pad sits between cutting and finishing.
For beginners, this is often an excellent place to start.
Combined with a suitable polish, a medium foam pad may remove surprising levels of swirling while still leaving a clean finish.
Foam Finishing Pads
These are softer pads designed primarily for gloss enhancement and final refinement.
They're ideal when:
-
Paint defects are very light
-
A previous cutting stage needs refinement
-
Maximum gloss is the objective
Microfiber Cutting Pads
Microfiber pads can produce significantly more correction than many foam combinations when used with a dual-action machine.
They're particularly effective on harder paints.
However, they require proper cleaning because the fibres can quickly become loaded with spent paint residue and polish.
A clogged microfiber pad can lose effectiveness and increase heat.
Wool Pads
Modern DA-compatible wool pads can offer considerable cutting ability.
But beginners should approach aggressive wool combinations carefully.
Extra cutting ability isn't automatically an advantage.
If you're correcting your first vehicle, learning machine control with a moderate foam combination is usually much safer.
How Many Pads Do You Need?
One of the most common beginner mistakes is buying one pad for an entire vehicle.
As polishing continues, a pad accumulates:
-
Polish residue
-
Removed paint material
-
Contaminants
-
Heat
The pad becomes less effective and may behave differently from when it was clean.
For a full vehicle, having several identical pads available is far better than trying to force one saturated pad through the entire job.
Clean the pad frequently during polishing and switch to a fresh pad when required.
Dual-Action Polisher vs Rotary Polisher
If you're purchasing your first machine, understanding this difference is critical.
Dual-Action Polisher
A traditional free-spinning dual-action—or DA—polisher combines rotation with an oscillating movement.
Instead of spinning continuously around one fixed axis, the pad follows two movements simultaneously.
This helps reduce concentrated heat and generally makes DA machines more forgiving than rotary polishers.
For most DIY users, a quality DA polisher is the best place to begin.
Advantages include:
-
Lower risk of concentrated heat
-
Easier machine control
-
Excellent swirl removal
-
Lower likelihood of holograms
-
Suitable for beginners
-
Excellent finishing capability
However, free-spinning machines can stall when the pad isn't kept reasonably flat, particularly around complex curves.
Rotary Polisher
A rotary machine spins the pad directly around a single axis.
Rotaries offer substantial cutting power and are highly useful in experienced hands.
But they also build heat quickly and require greater technique.
Poor rotary technique can cause:
-
Holograms
-
Excessive paint removal
-
Burn-through
-
Edge damage
-
Localised overheating
For your first correction, we generally would not recommend learning on a rotary machine simply because it appears faster.
Speed is irrelevant if the result requires repairing additional damage afterwards.
What About Forced-Rotation DA Machines?
Forced-rotation machines prevent the pad from stalling as easily and can provide stronger correction.
They sit somewhere between conventional free-spinning DAs and rotaries in terms of behaviour.
They are excellent professional tools but can transmit more movement and heat into the panel.
A conventional DA remains the simplest starting point for most DIY users.
What Size Polisher Should a Beginner Use?
A machine using roughly a 5-inch polishing system is popular because it offers a good compromise between:
-
Correction efficiency
-
Pad control
-
Access around body contours
-
Working speed
Very large pads can feel cumbersome on modern vehicles with complex panels.
Smaller spot-polishing machines and pads can be useful for:
-
Bumpers
-
Pillars
-
Narrow sections
-
Complex curves
But don't attempt to force a large pad into an area where it doesn't sit properly.
What If You Own No Polishing Tools?
You have three sensible options.
1. Improve the Paint Without Correcting It
Thoroughly wash, decontaminate and protect the vehicle.
You'll be surprised how much improvement can come simply from removing contamination.
Start with correct washing technique. Our ultimate hand car wash guide and two-bucket wash method explain safer washing practices.
2. Polish Light Defects by Hand
Hand polishing can improve:
-
Small isolated marks
-
Mild oxidation
-
Light staining
-
Very light surface haze
Use a suitable hand applicator and a relatively mild polish.
But understand its limitations.
Correcting an entire heavily swirled vehicle manually is extremely labour-intensive and usually cannot match the consistency of a DA machine.
3. Leave the Correction to a Professional
There is absolutely nothing wrong with owning no polishing equipment.
In fact, doing nothing can be safer than buying an aggressive compound and attaching an unsuitable polishing pad to whatever power tool happens to be in your garage.
We would particularly avoid treating a high-speed drill with a generic polishing attachment as though it were equivalent to a purpose-built DA polisher.
Preparing the Vehicle Before Paint Correction
Never polish a dirty vehicle.
Anything trapped between the pad and paint can introduce additional scratches.
Your preparation matters just as much as the actual machine polishing.
If you're unsure about safe washing techniques, see our guide explaining why hand washing remains one of the safest car wash choices.
Also read our guide to hand-washing mistakes that damage paint, because many of the swirls you're correcting were probably created during washing or drying in the first place.
Step-by-Step DIY Paint Correction Process
1. Inspect the Paint Before Touching It
Move the vehicle somewhere with strong, controlled lighting.
Inspect:
-
Swirls
-
Scratches
-
Oxidation
-
Water spots
-
Bird-dropping etching
-
Previous repairs
-
Clear-coat failure
-
Stone chips
-
Repainted panels
-
Sharp panel edges
-
Badges and trim
-
Paint protection film
Natural sunlight can reveal defects extremely well, but correction itself should generally be carried out on cool panels rather than baking paint in direct Australian sunlight.
Bird droppings can chemically etch paint, so don't automatically assume every mark should simply be compounded away. Read our guide on bird droppings and safe paint cleaning for more context.
2. Wash Thoroughly
Remove loose dirt before touching the paint mechanically.
Use a proper automotive wash product and safe wash media.
Wash from cleaner upper areas toward dirtier lower panels.
Avoid polishing paint contaminated with:
-
Road grime
-
Sand
-
Dust
-
Salt deposits
-
Insect residue
-
Grease
Dirty paint plus a polishing machine is effectively an uncontrolled abrasive system.
3. Decontaminate the Paint
Even freshly washed paint may still contain bonded contamination.
Depending on the vehicle, professional preparation may include chemical removal of iron contamination followed by mechanical decontamination where necessary.
Clay should be used only when needed because aggressive claying can itself produce marring.
Tree sap deserves special attention because rubbing hardened sap can damage paint. Our guide explains how to remove tree sap safely.
4. Dry the Car Properly
Use clean, high-quality microfiber towels or suitable drying equipment.
Dirty or rough towels can reintroduce the very defects you're about to correct.
We've explained this in more detail in why microfiber towels matter for car paint.
5. Mask Sensitive Areas
Protect areas such as:
-
Unpainted plastic
-
Rubber seals
-
Textured trim
-
Badges
-
Sharp body edges
-
Delicate decals
Compound residue can stain porous plastic.
Masking also helps prevent the pad from catching objects or repeatedly polishing thin edges.
6. Assess Paint Thickness and Repair History
Professional detailers often use a paint thickness gauge as part of their assessment.
However, beginners need to understand an important limitation.
Many common gauges measure the overall coating build above the metal substrate. They do not directly tell you exactly how much clear coat remains.
The readings are most useful comparatively.
For example, unusual readings between adjacent panels may suggest:
-
Previous repainting
-
Body repairs
-
Unusually thin paint
-
Additional paint layers
There is no universal paint-thickness number that automatically means a panel is safe to polish aggressively.
If you're unsure about the paint history, choose preservation over maximum defect removal.
7. Perform a Test Spot
This may be the single most important step.
Choose a representative section roughly 40 × 40 cm.
Start with a relatively mild combination.
For example:
Polishing pad + finishing or medium polish
Inspect the result.
If it produces enough improvement, you've found your system.
Only increase aggressiveness when necessary.
A test spot prevents you from unnecessarily compounding an entire vehicle.
8. Prime the Pad and Apply Product
Follow the polish manufacturer's instructions.
The objective is to distribute enough product across the working face without oversaturating the pad.
After the initial setup, only a small amount of additional product may be necessary for subsequent sections.
More compound does not automatically produce more correction.
Too much can:
-
Saturate the pad
-
Reduce abrasive effectiveness
-
Increase sling
-
Make residue difficult to remove
9. Work a Small Section
Don't try to polish half the bonnet at once.
Work systematically in manageable sections.
Keep the pad reasonably flat against the panel.
Use overlapping passes—often around 50% overlap—to maintain consistent coverage.
Move:
-
Horizontally across the section
-
Then vertically across the same area
This cross-hatch approach helps create uniform correction.
Machine speeds vary dramatically between brands and machines, so don't blindly copy somebody else's dial setting.
Follow your machine and polish manufacturer's operating guidance.
10. Use Controlled Pressure
Beginners often assume more pressure means faster correction.
It doesn't always.
Excessive pressure can:
-
Reduce pad rotation on free-spinning DAs
-
Increase heat
-
Stress the machine
-
Deform the pad
-
Make correction inconsistent
Use enough controlled pressure to keep the pad working effectively while maintaining proper movement.
A marker line on the backing plate can make pad rotation easier to observe on a free-spinning DA.
11. Never Hold the Machine Stationary
Heat becomes dangerous when concentrated.
Keep the machine moving.
Be particularly cautious around:
-
Raised body lines
-
Panel edges
-
Corners
-
Narrow pillars
-
Repainted areas
Paint is often less forgiving around edges because geometry and historical polishing can leave less material available.
12. Clean Your Pad Frequently
After each section or small number of sections, inspect and clean the pad.
Residue accumulation reduces performance.
A clean pad:
-
Cuts more consistently
-
Runs more predictably
-
Produces less unnecessary heat
-
Finishes better
Once a pad becomes excessively saturated, replace it with a fresh one.
Trying to complete an entire vehicle with one overloaded pad is false economy.
13. Wipe and Inspect
Use a clean microfiber towel to remove polish residue.
Inspect using appropriate lighting.
Don't simply look at the overall shine.
Check specifically for:
-
Remaining swirls
-
Micro-marring
-
Haze
-
DA haze
-
Compound residue
-
New scratches
If necessary, use an appropriate surface-preparation product to remove polishing oils and reveal the true finish.
Always confirm compatibility with the paint and any protection products being used.
14. Refine the Finish If Necessary
A cutting stage may remove defects while leaving slight haze.
The second stage might therefore use:
Soft polishing/finishing pad + fine polish
This removes the haze left by the stronger correction stage and improves optical clarity.
On certain paints, a two-step correction can produce substantially better clarity than aggressive single-stage polishing.
15. Protect the Corrected Paint
Freshly corrected paint should not simply be left exposed.
Depending on your priorities, protection may include:
-
Wax
-
Synthetic sealant
-
Ceramic coating
-
Paint protection film
Correction and protection perform different functions.
Correction improves the surface.
Protection helps preserve it afterwards.
Our ceramic coating vs wax guide explains the differences.
For a deeper understanding of coatings, read our ultimate ceramic coating guide.
Can You Paint-Correct a Ceramic-Coated Vehicle?
Yes, but there is an important catch.
Machine polishing is abrasive. It can reduce or remove the ceramic coating.
If your vehicle is already coated, don't start machine-polishing random sections because you've noticed a few swirls.
First determine whether the defect is:
-
In the coating
-
Beneath the coating
-
Surface contamination
-
Water spotting
-
Actual paint damage
If polishing becomes necessary, that area may require coating removal, correction and reapplication.
Our guide to ceramic-coated car wash mistakes explains how correct maintenance can reduce unnecessary correction later.
Paint Correction for Different Vehicle Classes
Standard and Daily-Driven Cars
For daily drivers, the objective should normally be meaningful improvement, durability and efficiency—not theoretical perfection.
A car used every day will continue encountering:
-
Road debris
-
Rain
-
UV exposure
-
Car parks
-
Dust
-
Bird droppings
-
Insects
-
Washing and drying cycles
A quality one-step correction may therefore make more sense than repeatedly cutting the clear coat to remove every faint mark.
This is particularly important when the vehicle may receive many correction treatments over its lifetime.
Afterwards, focus heavily on correct washing.
If your vehicle seems to become dirty unusually quickly, our article on how often you should wash your car may help establish a better maintenance routine.
Luxury and Exotic Cars: Preservation Comes First
For Ferrari, Porsche, Lamborghini and other premium or collector vehicles, we recommend shifting from a correction-first mindset to a preservation-first mindset.
The question becomes:
How can we improve this finish while preserving as much originality as possible?
Paint hardness and thickness can vary by manufacturer, model, panel and repair history.
Never assume an expensive vehicle automatically has:
-
Thick paint
-
Hard clear coat
-
Uniform factory paint
-
Never-polished surfaces
Carbon Fibre
Glossy carbon-fibre components may have a clear-coated surface, but construction and finishing methods vary.
Edges, transitions and exposed composite areas deserve particular caution.
Matte or satin carbon finishes should not be treated like conventional glossy clear coat.
Machine polishing can permanently alter the sheen.
Paint Protection Film
Do not treat PPF as normal paint.
Modern films can incorporate self-healing top layers and specialised coatings.
Aggressive polishing may:
-
Change gloss
-
Damage the film
-
Affect its top coat
-
Create excessive heat
-
Damage edges
Always identify the film and follow the manufacturer's maintenance requirements.
Our ceramic coating vs paint protection film guide explains how each protection system works.
Piano-Black Trim
Gloss-black exterior trim can be significantly more sensitive than the main painted bodywork.
An aggressive compound that performs well on a bonnet may haze a piano-black trim piece almost immediately.
Always test separately.
Alcantara, Leather and Specialised Interiors
Although paint correction primarily affects the exterior, compound dust can travel.
On premium vehicles with Alcantara, open-top interiors, special stitching or delicate leather, protect the cabin and sensitive materials before machine polishing.
Our Alcantara care guide explains why these surfaces require specialised treatment.
For high-value cars generally, see our best detailing practices for luxury cars.
Electric Vehicles
The basic paint-correction principles remain similar for EVs, but modern electric vehicles often incorporate:
-
Cameras
-
Sensors
-
Gloss-black trim
-
Plastic aerodynamic components
-
Complex panel materials
-
Charging-port areas
-
Large glass surfaces
Protect sensitive components and don't assume every glossy surface is conventional painted metal.
Our guide to EV detailing mistakes covers these issues in greater detail.
Australian Climate Considerations
Australian conditions can be brutal on vehicle finishes.
Sydney
Sydney vehicles can experience strong UV exposure, coastal salt contamination, summer heat, bird droppings and urban pollution.
Cars parked outside require particularly careful maintenance because contamination can bake onto hot paint.
Melbourne
Melbourne's rapidly changing weather means vehicles may experience rain, road contamination and sunshine within short periods.
Frequent wet-dry cycles can leave mineral deposits if water is allowed to repeatedly dry on the surface.
Brisbane
High humidity, strong UV, insects, tree contamination and intense summer conditions make regular maintenance especially important.
Organic contamination such as bird droppings should be removed promptly rather than allowed to bake into paint.
Adelaide
Hot, dry conditions can create heavy dust accumulation, while intense summer sun heats panels extremely quickly.
Do not polish sun-baked panels.
Perth
Perth's strong UV and coastal environment can combine environmental contamination with significant sun exposure.
Vehicles near the ocean may require more frequent washing to remove salt deposits.
Whatever Australian city you're in, polishing should ideally be performed on clean, cool panels in a shaded, controlled environment.
Ten Technical Questions DIY Detailers Should Ask Before Starting
1. Do I actually need a cutting compound?
Not necessarily.
Start with the least aggressive combination that achieves satisfactory correction.
2. Is microfiber always better than foam?
No.
Microfiber can provide greater correction, but foam may finish better depending on the paint and product.
3. Should I buy a rotary because professionals use them?
Not as your first machine.
A DA polisher offers an excellent combination of safety, correction ability and finish quality.
4. Can one pad polish the whole car?
Technically you could attempt it, but it isn't good practice.
Multiple clean pads provide much more consistent results.
5. Does higher machine speed always correct faster?
No.
Pad, product, pressure, paint type, heat, stroke length and technique all influence correction.
6. Should I use heavy pressure on deep scratches?
No.
Deep scratches may simply be too deep to remove safely.
More pressure cannot turn unsafe correction into safe correction.
7. Can I polish over ceramic coating?
Polishing can abrade or remove the coating.
Assess the coating and defect before proceeding.
8. Does a paint thickness gauge tell me how much clear coat is left?
Most common automotive gauges do not directly isolate the remaining clear-coat thickness.
Use readings comparatively and interpret them cautiously.
9. Should every visible scratch be removed?
Absolutely not.
Preserving clear coat is more important than achieving unrealistic perfection.
10. Is hand polishing useless?
No.
Hand polishing is useful for small areas and very light defects, but machine correction is substantially more effective for widespread swirling.
Common DIY Paint Correction Mistakes
Even good equipment cannot compensate for poor technique.
Common errors include:
-
Polishing dirty paint
-
Skipping decontamination
-
Starting too aggressively
-
Using one pad for the whole vehicle
-
Failing to perform a test spot
-
Working huge sections
-
Using excessive compound
-
Polishing hot panels
-
Using excessive pressure
-
Chasing deep scratches
-
Polishing sharp edges aggressively
-
Allowing pads to become clogged
-
Treating every surface like conventional clear coat
-
Failing to protect corrected paint afterwards
Perhaps the biggest mistake occurs after correction.
Owners often produce beautiful paint and then recreate swirl marks during the next few washes.
That's why maintenance technique matters just as much as correction.
Pro Tip: Your Wash Routine Determines How Long Correction Lasts
Professional correction can dramatically improve paint, but it cannot prevent future scratching.
If you correct the vehicle and then return to poor wash practices, swirl marks will gradually return.
Use:
-
Clean wash media
-
Quality automotive shampoo
-
Lubrication
-
Separate equipment for heavily contaminated areas
-
Safe drying towels
-
Minimal unnecessary paint contact
Avoid dragging dirt across the surface.
If you're considering waterless maintenance, use it only when appropriate. Our guide explains when a waterless wash can damage paint.
Also avoid unsuitable products. Read what happens when you use the wrong waterless wash product before experimenting with unfamiliar chemicals.
The best paint-correction strategy is ultimately to need paint correction less often.
Frequently Asked Questions
1. Can a Beginner Safely Do Paint Correction at Home?
Yes, light to moderate correction can be performed successfully by a careful beginner using a dual-action polisher, appropriate pads and a suitable polish.
The safest strategy is to thoroughly prepare the vehicle, perform a test spot and start with a mild combination.
Beginners should avoid chasing deep defects or experimenting aggressively on high-value vehicles.
2. Can Paint Correction Remove Every Scratch?
No.
Paint correction is primarily intended for defects within the upper paint surface.
Deep scratches, chips and defects extending through the clear coat cannot safely be polished away.
Trying to completely remove them could sacrifice too much surrounding paint.
Sometimes reducing the appearance of a defect while leaving some visible evidence is the correct professional decision.
3. How Often Should a Car Be Paint-Corrected?
There is no fixed schedule.
Paint correction should be performed when needed, not as routine maintenance.
Because correction removes a microscopic amount of material, repeatedly polishing simply to maintain gloss is unnecessary.
A safer strategy is:
Correct once properly → protect the paint → maintain it carefully → polish again only when genuinely required.
Professional Assistance & Call to Action
DIY paint correction can be extremely rewarding.
For a relatively healthy daily driver with light swirling, a quality dual-action polisher, several pads, a suitable polish and careful technique can produce excellent results.
But paint correction becomes considerably more complicated when you're working with:
-
Severe swirling
-
Unknown paint history
-
Repainted panels
-
Very thin paint
-
Deep scratches
-
Ceramic-coated surfaces
-
Paint protection film
-
Carbon fibre
-
Exotic vehicles
-
Collectable cars
-
High-value luxury vehicles
Professional detailing gives you access to specialised machines, multiple pad and abrasive combinations, controlled inspection lighting and experienced defect assessment. That helps minimise unnecessary paint removal and reduces the chance of expensive mistakes.
If you don't have the equipment, working environment or time to prepare and restore the vehicle properly, Gleamoo's Deep Detailing option is the most relevant starting point for a vehicle needing comprehensive cosmetic restoration and preparation.
And once the paint has been properly prepared, owners looking for longer-term exterior protection can explore Gleamoo Shield Protection.
For high-value and exotic vehicles in particular, the objective isn't simply making the car shinier.
It's achieving the best reasonable finish while preserving the paint, materials and long-term value of the vehicle.
Final Thoughts
DIY paint correction isn't about buying the strongest compound and the most powerful machine.
Successful correction comes from understanding the relationship between:
Paint + defect + pad + abrasive + machine + technique.
For most beginners, a dual-action polisher paired with a moderate foam pad and quality polish is a sensible starting point.
Perform a test spot.
Inspect your results.
Increase aggressiveness only when necessary.
And remember that removing every defect is not always the mark of a skilled detailer.
Sometimes the most professional decision is knowing when to stop.
A beautifully corrected vehicle with healthy clear coat remaining is far more valuable than a technically flawless panel that has been unnecessarily over-polished.
Protect the finish afterwards, maintain it using safe washing practices and you'll dramatically reduce how often aggressive correction is needed in the future.
About the Author
Tipsy Batta, is passionate about practical automotive care, paint preservation and helping Australian drivers understand what their vehicles genuinely need—not simply what looks impressive on a product label.
Through Gleamoo's educational guides, Tipsy aims to make professional detailing knowledge easier for everyday drivers to understand while highlighting the extra care required for luxury, exotic and high-value vehicles.
Whether you're maintaining a daily commuter or preserving a prized performance car, the philosophy remains the same: clean safely, correct conservatively and protect intelligently.