
Author: Tipsy Batta
Estimated Read Time: 5 minutes
Introduction
A vehicle's cabin can easily look "mostly clean" on the surface until you take a closer look. Over time, everyday use leaves behind hidden crumbs wedge between seat bolsters, baked-on dust inside air conditioning vents, sticky syrups inside cup holders, cloudy interior glass film, woven pet dander, and a faint, stale cabin odour that never completely goes away. Fortunately, deep cleaning and protecting your automotive environment does not require years of professional training. By following a structured, systematic process, you can clean smarter, protect vulnerable interior materials from premature wear, and target the hidden hotspots that most car owners overlook.
This professional-grade interior detailing checklist is tailored specifically for everyday Australian drivers who want practical, safe, and highly effective step-by-step guidance. For a comprehensive, master-level look at total cabin care, including advanced material preservation methods, you can read our master resource: Ultimate Interior Detailing Guide for Every Vehicle.
Why Deep Interior Detailing Beats a Quick Surface Wipe
What are the main benefits of a full car interior detail?
A full interior detail permanently removes ground-in environmental contaminants, sanitises high-touch surfaces, clears toxic dust from climate control systems, and shields fabrics and leather from intense UV rays. Unlike a casual vacuuming session, detailing neutralises underlying odour sources and restores the vehicle’s original factory finish, dramatically improving your daily driving comfort and boosting long-term resale value.
Automotive interiors endure a continuous barrage of daily contaminants, including skin oils, heavy sunscreen creams, snack crumbs, coffee spills, airborne pollen, abrasive beach sand, pet dander, and dirt tracked in on shoes. In major metropolitan areas like Sydney, vehicles deal with a tough combination of coastal salt air, heavy school-run activity, wet-weather mud, and intense summer heat that bakes dust onto the dashboard.
During the warmer months, sunscreen and body oils break down the protective top coats on leather, vinyl, and steering wheel coverings. Using a consistent, structured checklist helps you stay on top of this damage, ensuring a healthy, hygienic environment for families, rideshare drivers, and daily commuters who spend hours on the road.
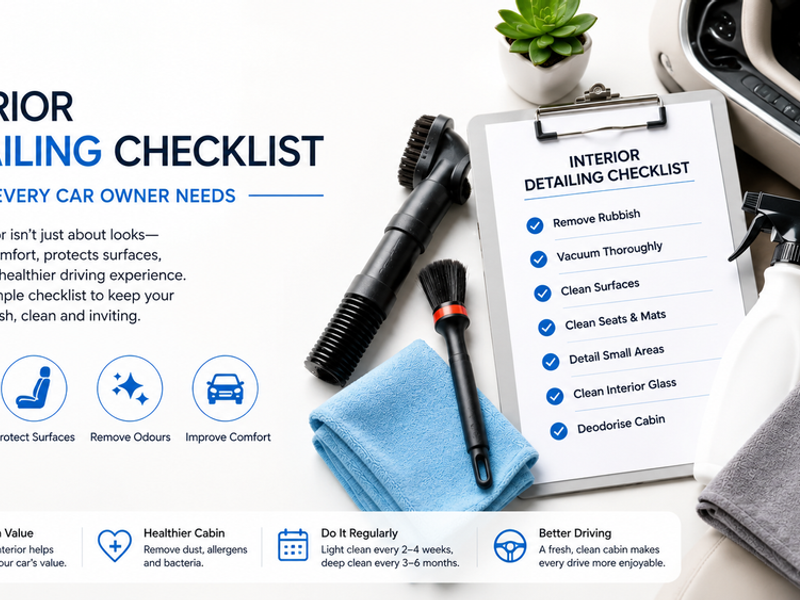
The Step-by-Step Car Interior Detailing Checklist
Step 1: Clear the Cabin of Rubbish and Personal Items
Completely empty the entire vehicle before touching a cleaning tool. Thoroughly check the glove compartment, centre console bins, seatback pockets, under-seat floor sections, the rear boot cargo space, and side door pockets. Removing clutter up front gives you clear, unobstructed access to hidden debris and prevents you from missing tight areas. This is also the perfect time to discard old receipts, food wrappers, coins, and stray bottles that have collected over time.
Step 2: Vacuum Methodically From Top to Bottom
Always complete your vacuuming before using any liquid cleaners on hard surfaces. Work from the top of the cabin downward: vacuum the seats first, then the lower footwells, floor carpets, seat rail tracks, boot liner, and recessed panel seams. Use a dedicated narrow crevice tool to clear out crumbs from tight gaps beside the seats and around the centre console architecture. For heavily neglected interiors, our deep-dive guide on hidden car interior spots most drivers forget to clean serves as an excellent reference for hunting down buried grime.
Step 3: Remove and Detail Floor Mats Separately
Take all floor mats completely out of the vehicle before cleaning. Give them a firm shake outside to dislodge loose gravel, vacuum both sides thoroughly, and scrub heavy-duty rubber mats using a dedicated interior cleaner and a stiff-bristled brush. Fabric carpet mats require targeted upholstery shampooing if they hold deep mud stains or pet smells. Always allow the mats to air-dry completely in a well-ventilated spot before putting them back inside; trapping damp mats in a closed car rapidly triggers sour, musty mould growth.
Step 4: Dust and Clean the Dashboard, Console, and Trims
Use a super-soft detailing brush or a clean microfiber cloth to gently clear dust from the instrument cluster, air conditioning vents, steering wheel column, gear selector, physical buttons, infotainment screens, and door panels. Never use harsh household multi-purpose sprays, which can cause permanent chemical staining on automotive plastics, delicate leather, and touchscreens. For modern electronic displays and glossy piano black plastics, stick to a dry, plush microfiber cloth and a mild, automotive-approved interior detailer to prevent micro-scratching.
Step 5: Clean Seats Based on Upholstery Material
-
Fabric and Cloth Upholstery: Thoroughly vacuum the fabric first to remove loose grit, then use a specialized upholstery foam cleaner to treat stains. Avoid over-wetting the fabric, as excess moisture will soak deep into the seat foam core, leading to slow drying times and internal mildew.
-
Genuine Leather Seating: Apply a dedicated, pH-neutral leather cleaner using a soft horsehair brush or a microfiber towel to gently emulsify embedded oils and sweat. Once dry, apply a high-quality leather conditioner to nourish the material, protecting it from drying, cracking, and looking unnaturally shiny.
-
Vinyl and Synthetic Leather: Wipe down synthetic materials with a mild interior cleaner, then apply a non-greasy, matte-finish UV protectant to shield the panels from sun damage.
Step 6: Purge Cup Holders, Door Pockets, and Small Gaps
Cup holders easily become one of the stickiest areas in any vehicle due to spilled drinks and condensation. Mist a mild interior cleaner into the holder, let it sit briefly to soften dried residue, and wipe it clean with a damp microfiber cloth. For tight seams, physical buttons, and small trim lines, use cotton swabs or fine detailing brushes to pull out packed grime. This level of precision is exactly what sets professional detailing apart from a quick car wash.
Step 7: Clean Interior Glass to a Streak-Free Finish
Interior glass accumulates an oily, cloudy haze caused by plastic vinyl off-gassing, tobacco or vape smoke, airborne dust, and fingerprint smudges. Clean your windows using a dedicated automotive glass cleaner and a two-towel system: use the first microfiber towel to spread the cleaner and dissolve the film, and the second dry towel to buff the glass to a perfectly clear finish. Save the inside front windscreen for last to ensure it doesn't catch any drifting dust from earlier cleaning steps.
Step 8: Neutralise Odours and Deodorise the Cabin
Persistent bad smells inside a car are almost always caused by trapped moisture, rotting food particles, pet dander, or spilled milk deep within the fabrics. Avoid simply spraying a strong perfume or masking air freshener over the problem area. Instead, track down and remove the physical source of the smell, deep-clean the affected surface, and apply a dedicated enzyme-based odour neutraliser. If a foul smell remains after a thorough DIY cleaning, the seats, lower carpets, or rear boot lining may require deep hot-water extraction. For a broader look at complete vehicle maintenance, check out our guide on Ultimate Guide to Full Car Detailing.
Pro-Tip: Always Work Dry Before You Work Wet
One of the most common mistakes car owners make is spraying liquid cleaners onto surfaces far too early. Always remove loose dust, crumbs, and sand first. If you apply liquid spray to dry dirt, you will instantly create a muddy residue that pushes grime deeper into carpet weaves and upholstery seams, or drags abrasive sand across delicate plastic panels, causing fine scratches.
Dry vacuuming and brushing first ensures a clean, scratch-free surface. Additionally, never spray liquid protectants directly onto electronic screens, infotainment clusters, or steering wheel buttons. Always spray your cleaner lightly onto a microfiber cloth first, then use the cloth to wipe the surface safely.
How Often Should You Detail Your Car Interior?
To keep your car's cabin in optimal condition, aim for a quick maintenance clean every 2 to 4 weeks, combined with an intensive, deep interior detail every 3 to 6 months. This schedule prevents body oils from degrading leather coatings and stops sand from grinding away at carpet backings. If your car frequently handles young kids, large pets, regular beach trips, or high-frequency rideshare driving, you will want to step up this schedule to keep the cabin sanitary. For more specific guidelines tailored to your driving habits, explore our full guide on how often you should detail your car interior properly.
Professional Detailing Assistance & Call to Action
Regular DIY interior cleaning is an excellent practice for standard weekly car maintenance. However, if your vehicle is dealing with deeply set coffee stains, stubborn pet hair weaves, fine beach sand, or sticky liquid spills that have soaked deep into the seat foam, a standard home vacuum and wet wipe simply won't cut it. In these scenarios, professional mobile detailing offers a far safer, faster, and more effective solution.
Gleamoo brings commercial-grade hot water extractors, high-pressure air purging tools, and material-safe sanitizers right to your door. For a total interior restoration, our highly recommended package is the Deep Detailing package. This option is specifically designed to thoroughly deep-clean seats, carpets, floor mats, door trims, and tight crevices, while also refreshing the exterior for a complete, showroom-ready finish:
If your vehicle also requires specialized exterior paint maintenance or paint protection care, you can explore our professional options or learn more about our mobile team through these official resources:
Frequently Asked Questions
1. What specific steps are included in a professional interior car detail?
A professional interior car detail includes deep vacuuming, intensive dust removal from vents and crevices, cleaning and sanitising all hard surfaces, streak-free window cleaning, hot water extraction shampooing for fabric seats and carpets, floor mat washing, leather cleaning and conditioning, and targeted cabin odour neutralisation.
2. Can I safely use common household cleaners inside my car cabin?
It is highly recommended to avoid household multi-purpose sprays, dish soaps, or glass cleaners inside a vehicle. Many household formulas contain ammonia, alcohol, or harsh detergents that can permanently dry out automotive leather, fade vinyl panels, strip protective UV block layers, and leave behind sticky, dust-attracting films. Always stick to products formulated specifically for car interiors.
3. Why does an unpleasant smell persist even after I have vacuumed my car?
If a stubborn odour remains after a thorough vacuum and surface wipe, the root cause is likely trapped deep within the open-cell seat foam padding, lower carpet backing layers, or the air conditioning system. To permanently eliminate the smell, these areas require specialized enzymatic breakdowns, professional hot water extraction, or an active ozone treatment.
About the Author
Tipsy Batta is an experienced member of Team Gleamoo, dedicated to providing Australian car owners with practical, straightforward, and highly effective vehicle maintenance guidance. Combining a true passion for automotive hygiene with a commitment to material preservation, Tipsy focuses on delivering actionable advice and professional detailing standards that make keeping your car fresh, comfortable, and protected simple and stress-free.